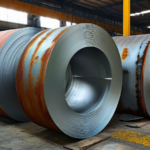
Introduction: The Critical Role of Third-Party Inspections in Steel Supply Chains
In global steel procurement, the margin for error is razor-thin. A single batch of non-compliant or substandard steel can compromise structural integrity, trigger catastrophic failures, and expose stakeholders to severe legal, financial, and reputational risks. Whether destined for high-rise construction, offshore platforms, or pressure vessels, steel must perform reliably under extreme conditions. This is precisely why third-party quality inspections before shipping are not optional—they are essential safeguards.
Independent inspectors serve as impartial gatekeepers, verifying that every shipment aligns with contractual obligations and international standards. Their work mitigates the dangers of material substitution, dimensional inaccuracies, and hidden defects that may escape in-house checks. By identifying non-conformities early, they prevent costly rework, project delays, and potential liability claims. In an industry where trust is earned through traceability and transparency, third-party validation is the cornerstone of supply chain integrity.
Pre-Shipment Inspection Framework: Core Objectives and Scope
A robust pre-shipment inspection program begins with a clearly defined scope grounded in contractual and regulatory requirements. The inspector’s mandate centers on four core objectives: compliance verification, traceability confirmation, dimensional accuracy, and environmental suitability.
First, inspectors ensure the steel conforms to specified standards such as ASTM, EN, or JIS, depending on the project’s geographic and technical context. Second, they validate material traceability through Mill Test Reports (MTRs), cross-referencing heat numbers and batch IDs against purchase orders. Third, physical dimensions—including thickness, width, and camber—are measured against allowable tolerances. Finally, the inspection scope is tailored to project-specific demands: seismic-resistant structures require enhanced ductility verification, while marine environments necessitate corrosion resistance validation.
Documentation Review: The First Line of Defense
Long before any physical testing occurs, inspectors scrutinize documentation—a step often underestimated but critically important. Mill Test Reports (MTRs) serve as the steel’s “birth certificate,” detailing chemical composition, mechanical properties, and heat treatment history. Inspectors verify that these reports match the ordered specifications and are issued by accredited laboratories.
They also cross-check heat numbers, batch identifiers, and certification stamps against shipping manifests and purchase agreements. Discrepancies—such as missing data fields, inconsistent signatures, or altered document dates—are immediate red flags. Moreover, inspectors assess conformity with standards like ASTM A6 (for structural steel) or ISO 630 (for general-purpose grades). This paper-based due diligence prevents fraudulent substitutions and ensures every coil, plate, or beam can be traced back to its origin.
Physical and Dimensional Verification
Once documentation is cleared, inspectors conduct hands-on verification of the steel’s physical condition. Using calibrated micrometers, calipers, and laser measurement tools, they assess thickness, width, length, and camber. Even minor deviations can affect fit-up during fabrication or compromise load-bearing capacity in final assemblies.
Surface quality is equally critical. Inspectors examine each piece for cracks, laps, seams, pitting, scaling, or rust—defects that may indicate poor rolling practices or inadequate storage. Straightness and flatness are evaluated per standard tolerances (e.g., ASTM A6 limits for camber in beams). For welded components, seam uniformity and absence of undercut or porosity are verified visually and, where needed, with magnification aids.
Sampling Strategy: How Much to Test and Why
Given the volume of steel in typical shipments, 100% inspection is impractical. Instead, inspectors employ statistically sound sampling methods such as Acceptable Quality Levels (AQL) per ISO 2859. The sample size depends on batch size, risk level, and application criticality.
High-consequence projects—such as bridges, nuclear facilities, or offshore rigs—warrant risk-based sampling with larger sample sizes and stricter acceptance criteria. Mixed batches containing multiple heats or sizes require stratified sampling to ensure representation across all variants. Crucially, chain-of-custody protocols are enforced: samples are sealed, labeled, and tracked from extraction to testing to prevent tampering or mislabeling.
Mechanical Property Testing: Validating Strength and Durability
Mechanical testing confirms that steel will perform as expected under real-world loads. Tensile testing measures yield strength, ultimate tensile strength, and elongation—key indicators of structural reliability. Bend tests evaluate ductility by assessing the material’s ability to deform without cracking. For applications in cold climates or dynamic loading scenarios, Charpy V-notch impact testing quantifies toughness and resistance to brittle fracture.
Hardness testing (Brinell or Rockwell) provides a rapid proxy for wear resistance and is particularly useful for wear plates or machinery components. While some tests can be performed on-site with portable equipment, critical evaluations should be conducted in ISO/IEC 17025-accredited laboratories to ensure accuracy and defensibility.
Chemical Composition Analysis: Beyond the Certificate
Even with a valid MTR, chemical verification is essential to detect material substitution—a common issue in cost-driven markets. Portable X-ray fluorescence (XRF) spectrometers allow inspectors to perform rapid, non-destructive elemental analysis on-site. For higher precision, Optical Emission Spectrometry (OES) or spark testing may be used, especially when verifying low-alloy or high-strength grades.
Common discrepancies include incorrect carbon content (affecting weldability) or missing alloying elements like chromium or molybdenum (impacting corrosion resistance and high-temperature performance). Any deviation from the declared composition triggers a non-conformance report and halts shipment until resolved.
Non-Destructive Testing (NDT): Detecting Hidden Flaws
Surface inspections reveal only part of the story. Non-destructive testing (NDT) uncovers subsurface defects that could lead to premature failure. Ultrasonic Testing (UT) uses high-frequency sound waves to detect internal cracks, voids, or inclusions—particularly vital for thick plates or forgings.
Magnetic Particle Inspection (MPI) identifies surface and near-surface discontinuities in ferromagnetic steels by applying a magnetic field and iron particles. Dye Penetrant Testing (DPT) detects fine surface cracks in non-magnetic grades using colored or fluorescent penetrants. While radiography (RT) is less common pre-shipment due to cost and safety constraints, it is employed for critical welds in pressure vessels or nuclear components.
Packaging, Marking, and Traceability Checks
Proper packaging and marking are final but vital steps in preserving quality during transit. Inspectors verify that protective measures—such as galvanizing, paint coatings, VCI paper, or desiccants—meet specification requirements. Bundling and strapping must prevent shifting, abrasion, or moisture ingress.
Each piece must bear legible, permanent markings indicating steel grade, heat number, dimensions, and country of origin. These markings enable full traceability from mill to end-user, facilitating recalls or audits if needed. Missing or illegible markings constitute a non-conformance, as they break the chain of accountability.
Reporting and Non-Conformance Management
A comprehensive inspection report is more than a checklist—it’s a decision-making tool. Reports include an executive summary, detailed test results, photographic evidence, and a classification of non-conformities (critical, major, or minor). Critical defects—such as incorrect chemistry or structural cracks—result in immediate hold tags and shipment rejection.
Inspectors coordinate closely with suppliers, buyers, and logistics teams to initiate corrective actions: rework, replacement, or quarantine of affected batches. Clear communication ensures swift resolution while maintaining audit trails for compliance and dispute resolution.
Conclusion: Elevating Supply Chain Integrity Through Rigorous Inspection
Third-party steel inspection before shipping is not a bureaucratic hurdle—it is a strategic investment in quality, safety, and long-term reliability. From documentation review and dimensional checks to mechanical testing, chemical analysis, and NDT, each step serves a distinct purpose in mitigating risk.
The cost of skipping inspection pales in comparison to the potential consequences: structural failures, project overruns, legal liabilities, and reputational damage. By engaging accredited inspectors, defining precise scopes of work, and fostering collaboration across the supply chain, buyers can transform inspection from a compliance exercise into a competitive advantage.
In today’s complex global market, verified quality isn’t just expected—it’s essential. Treat third-party inspection not as an expense, but as your most reliable safeguard against uncertainty.


